Auto Layout
Auto Layout automatically arranges a group of components without overlaps, and let’s you specify the spacing between them. This is a convenient way of creating cut files with components that change in size as you customize the project, and it saves you from having to manually reposition the parts.
How to use it
We’ll use this layered gift tag as an example.

The tag has 3 different components: Name, Backer and Outline

Start by creating a new component (usually called Cut), now go to to the search bar, type “auto layout”, and you’ll find it in the Advanced section, then drag it to the center of the canvas.
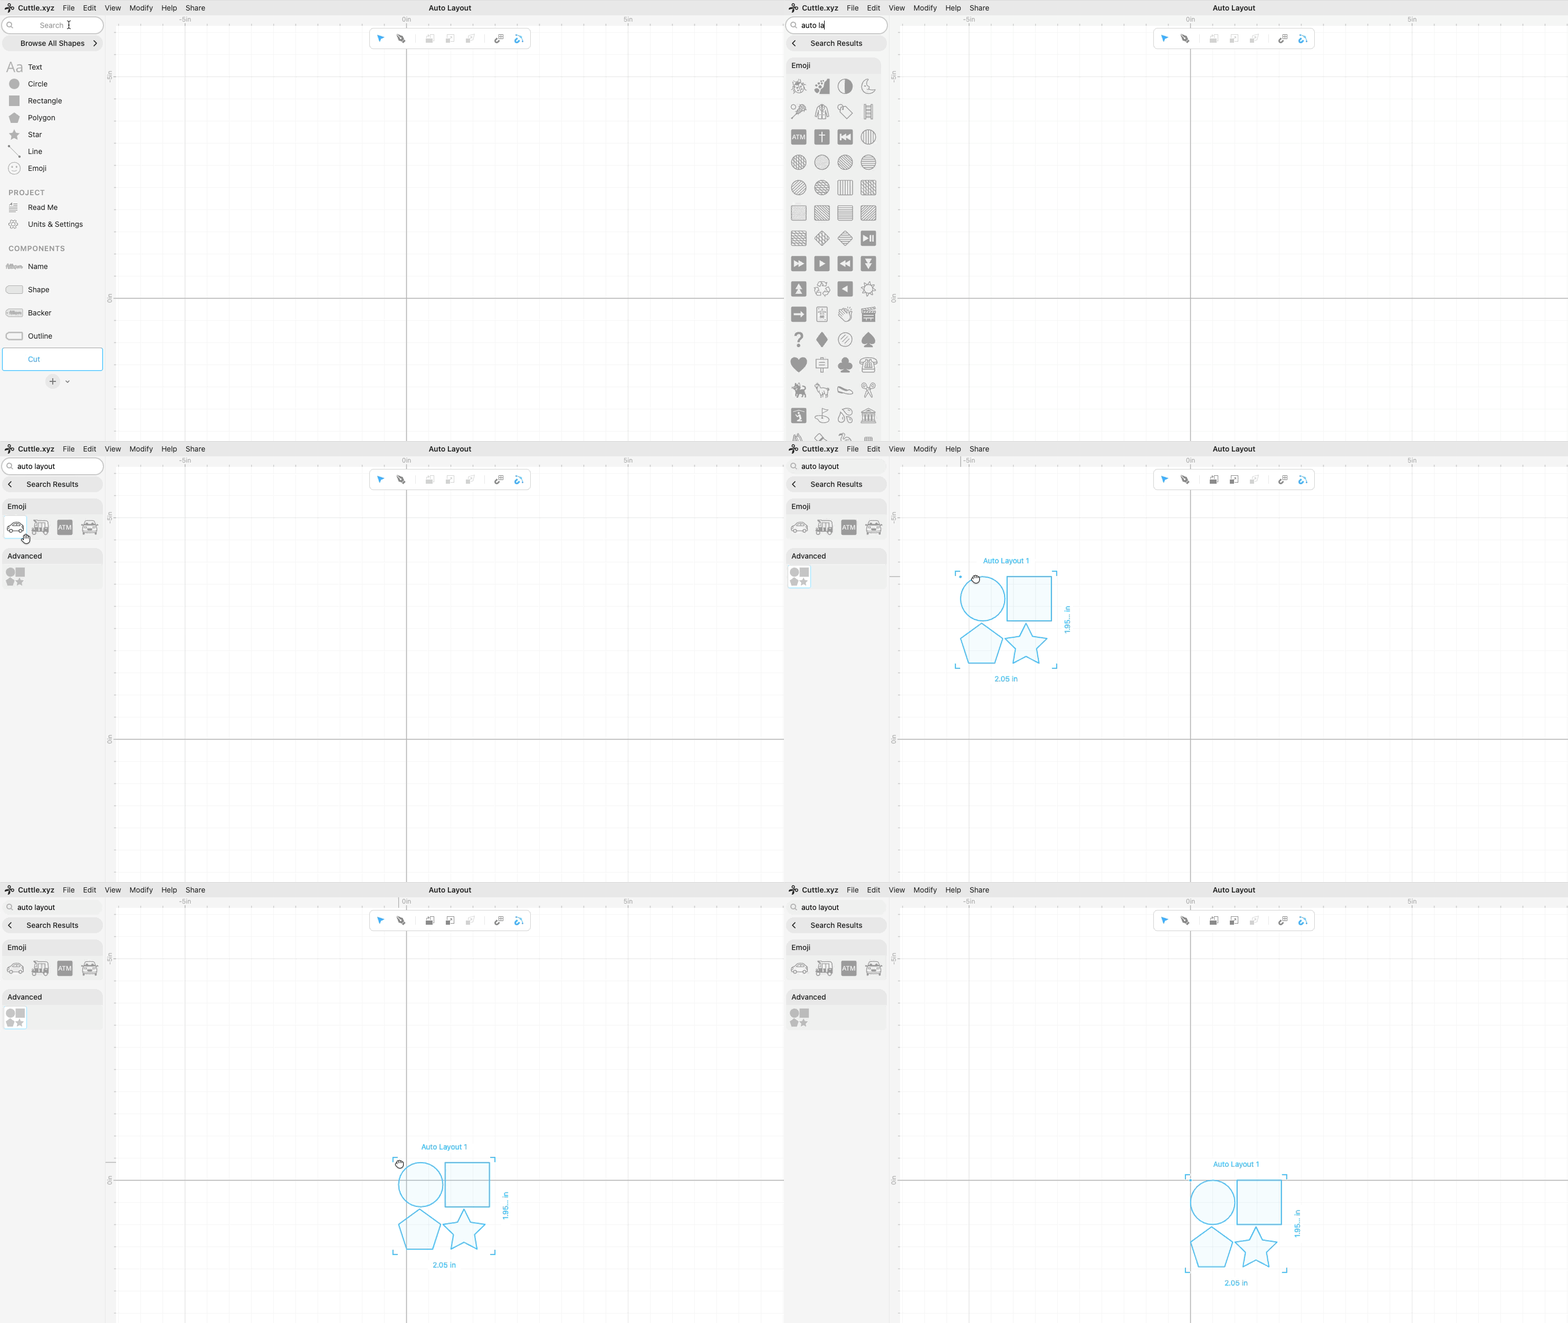
As a default Auto Layout will have a list of pieces including Circle, Rectangle, Polygon and Star.

Notice that in the pieces parameter rows of elements are organized inside square brackets and everything is separated by commas. So [Circle, Rentangle] corresponds to the first row, and [Polygon, Star] to the second row.
For the layered tag example we can organize the Name, Backer and Outline components in a single column with this expression:

But you can always use square brackets to organize the components in other ways, for example with the Name in a row and the Backer and Outline components in a separate row defined by the square brackets.

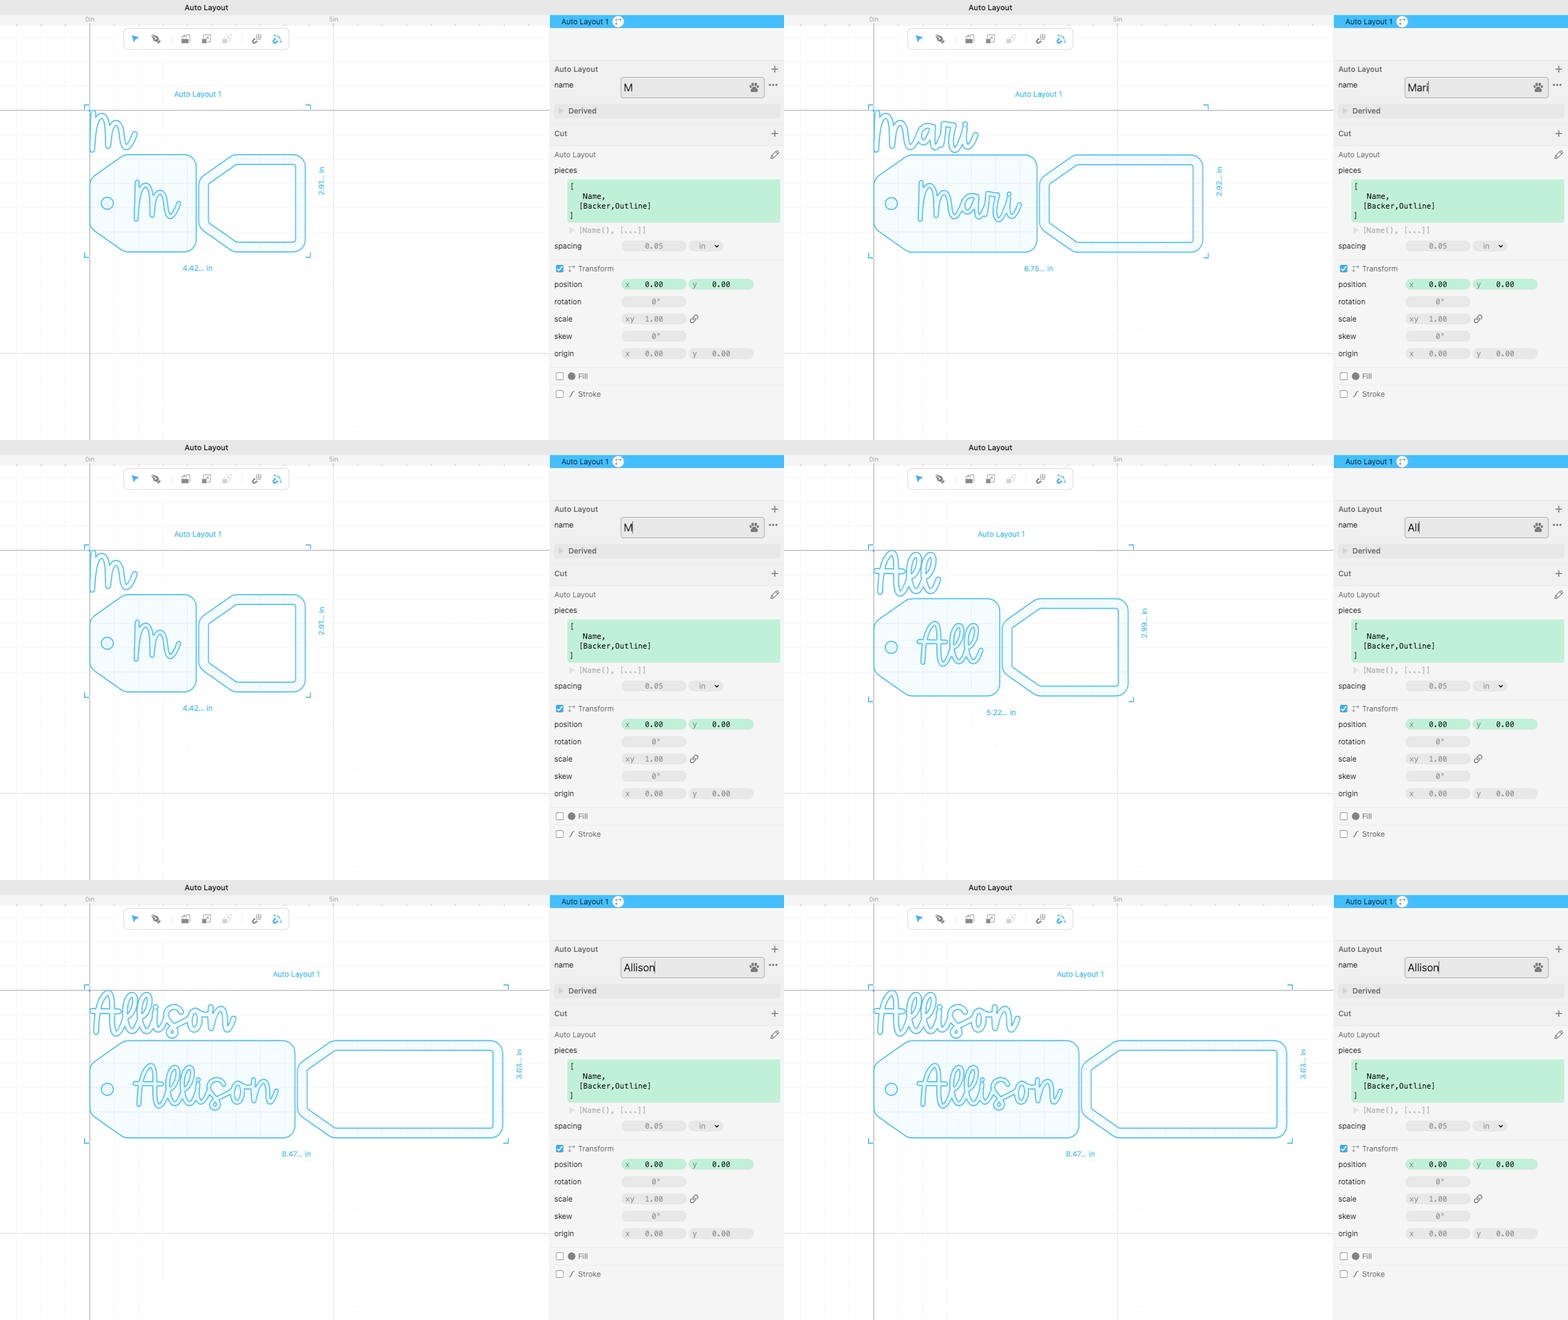
When the size of the name and tags changes, Auto Layout will space the components accordingly.
Transforming Auto Layout elements
You can use the .transform method inside Auto Layout, for example if you need to rotate or scale any of the elements (read more about other transformations in Scripting Fundamentals).
For example, to rotate the Backer by 90 degrees we can use this expression.
Here it is inside Auto Layout with both Backer and Outline rotated by 90 degrees.

Modifying Component Parameters
It’s also possible to change the value of component parameters within Auto Layout. For example the Polygon component in Cuttle has a parameter that specifies the number of sides. So we can call different instances of Polygon with different parameter values.

And this applies to any component you create that has Component Parameters. Here is an example with a simple Keychain component that adds a hole to some connected text, and it has a Component Parameter called name . Each instance of the Keychain component gets a different name assigned to it.

Creating a bulk production option with Auto Layout
Many of Cuttle’s templates have a bulk production feature where you can type multiple names and instantly generate a cut file in one go. For example the Layered Keychain, Reindeer Ornament , and Stocking Tags templates.
Here is one way to implement this feature:
- You need to start with a component that has a Component Parameter, like the
Keychaincomponent from the previous example. One way to test things are working is to use it inside Auto Layout with a basic expression where we assign a value to the parametername.[ Keychain({name:"Maria"}), Keychain({name:"Rose"}), ]
- Now we can create a new component called
Bulkwith a component parameter callednames, change the parameter type of this component to be Text and type a list of names separated by newlines (that is, press enter after typing each name).
- Create an additional parameter called
namesListand use the following expression.names.split("\n")
This turns the
namesparameter into a comma separated list of strings, using the newline\nas the point of separation. - Now to map the
namesListonto theKeychaincomponent we can use this expression inside Auto Layout.[ [namesList.map(name =>Keychain({name}))] ]
This effectively loops over each element of the
namesListarray, and applies it to theKeychainnameparameter, then returns a new array containing the results.
Watch this video has a more detailed walk through and explanation of the process