Adding your own fonts
Note: Adding your own fonts is a Cuttle Pro feature.
When you open the Font Picker, click “Add Font…”
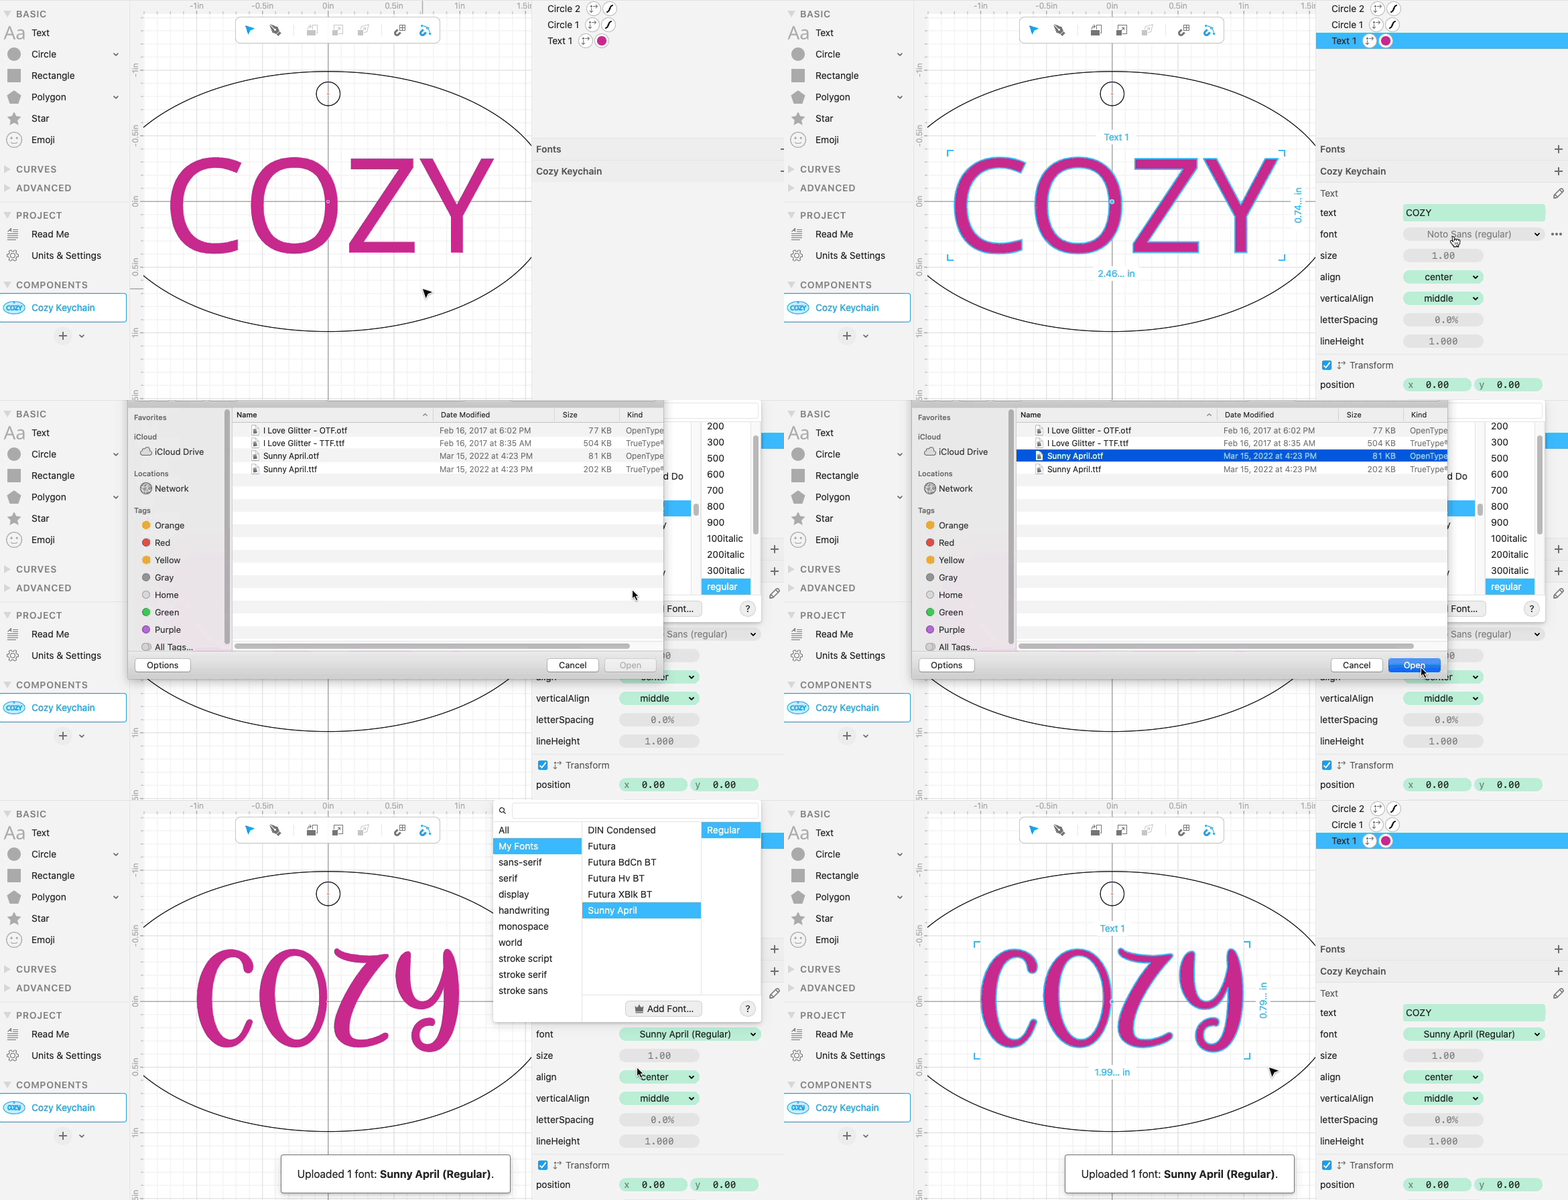
You can then choose any font file (.ttc, .ttf, .otf, or .woff) on your computer.
Once you’ve uploaded a font, it will be available in all your projects. Just look in the My Fonts category.

You can also upload your fonts by dragging font files into the Cuttle window. Those fonts will then be available to you in “My Fonts”.
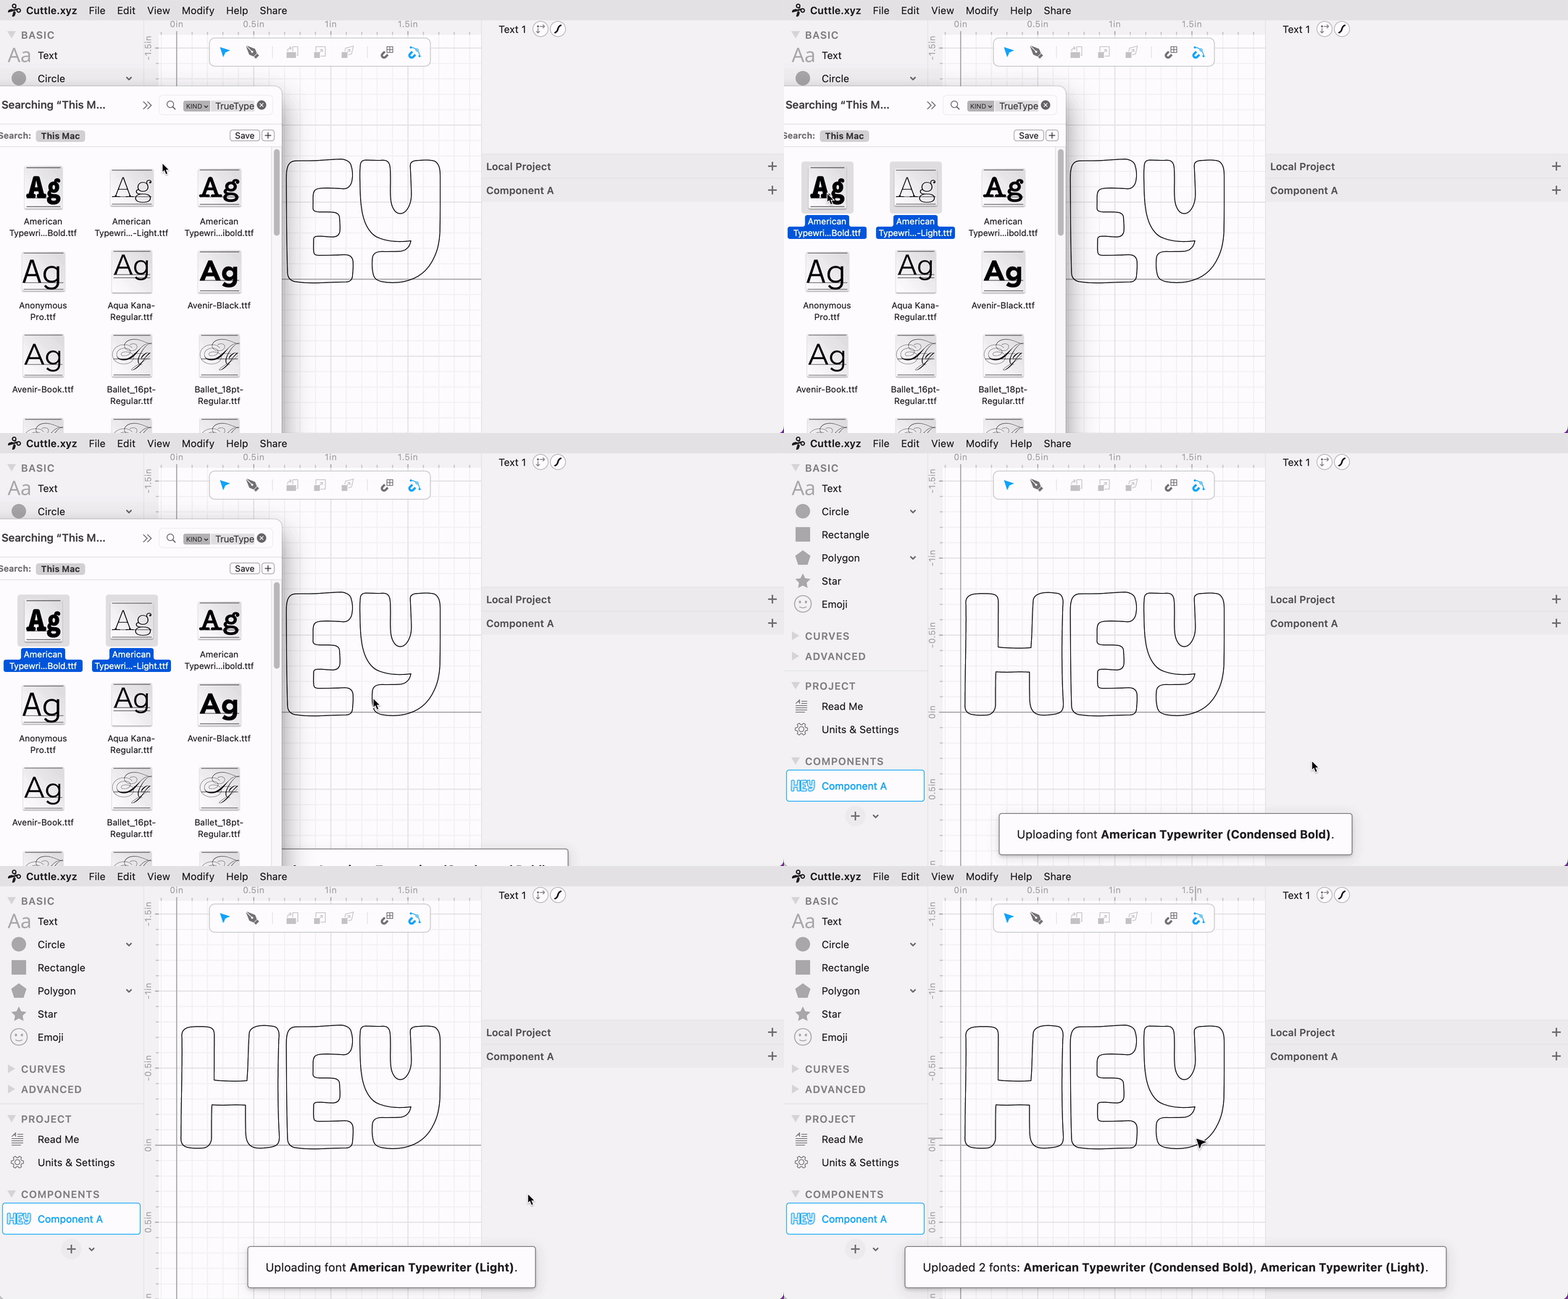
Finding free fonts on the web
You can find free fonts on various websites. For example:
macOS: Adding your system’s fonts
Your computer comes with various fonts (e.g. Futura) or you may have installed fonts to your system. To find these font files so that you can upload them to Cuttle, follow these steps:
- Open the Font Book app by pressing command-space, type “Font Book”, and press Enter.

- Choose the font you want to add. Right click it and select Show in Finder.
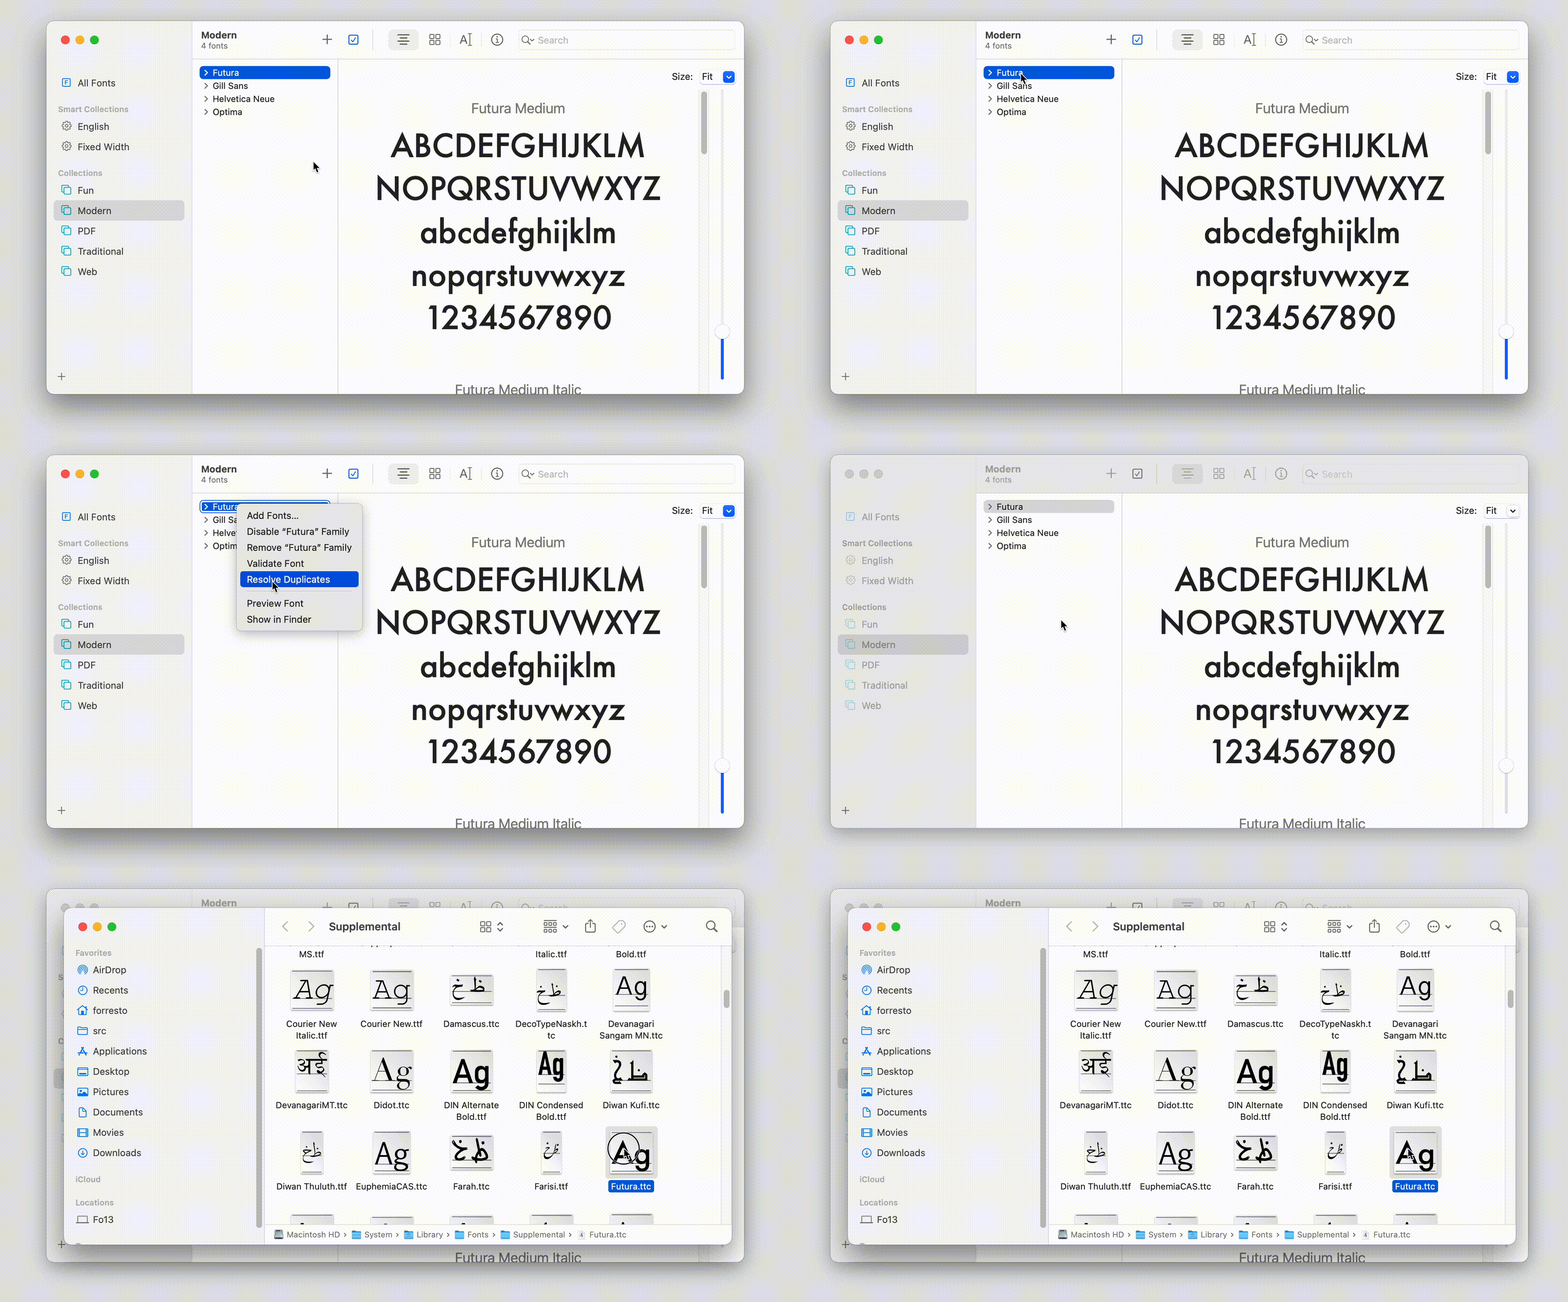
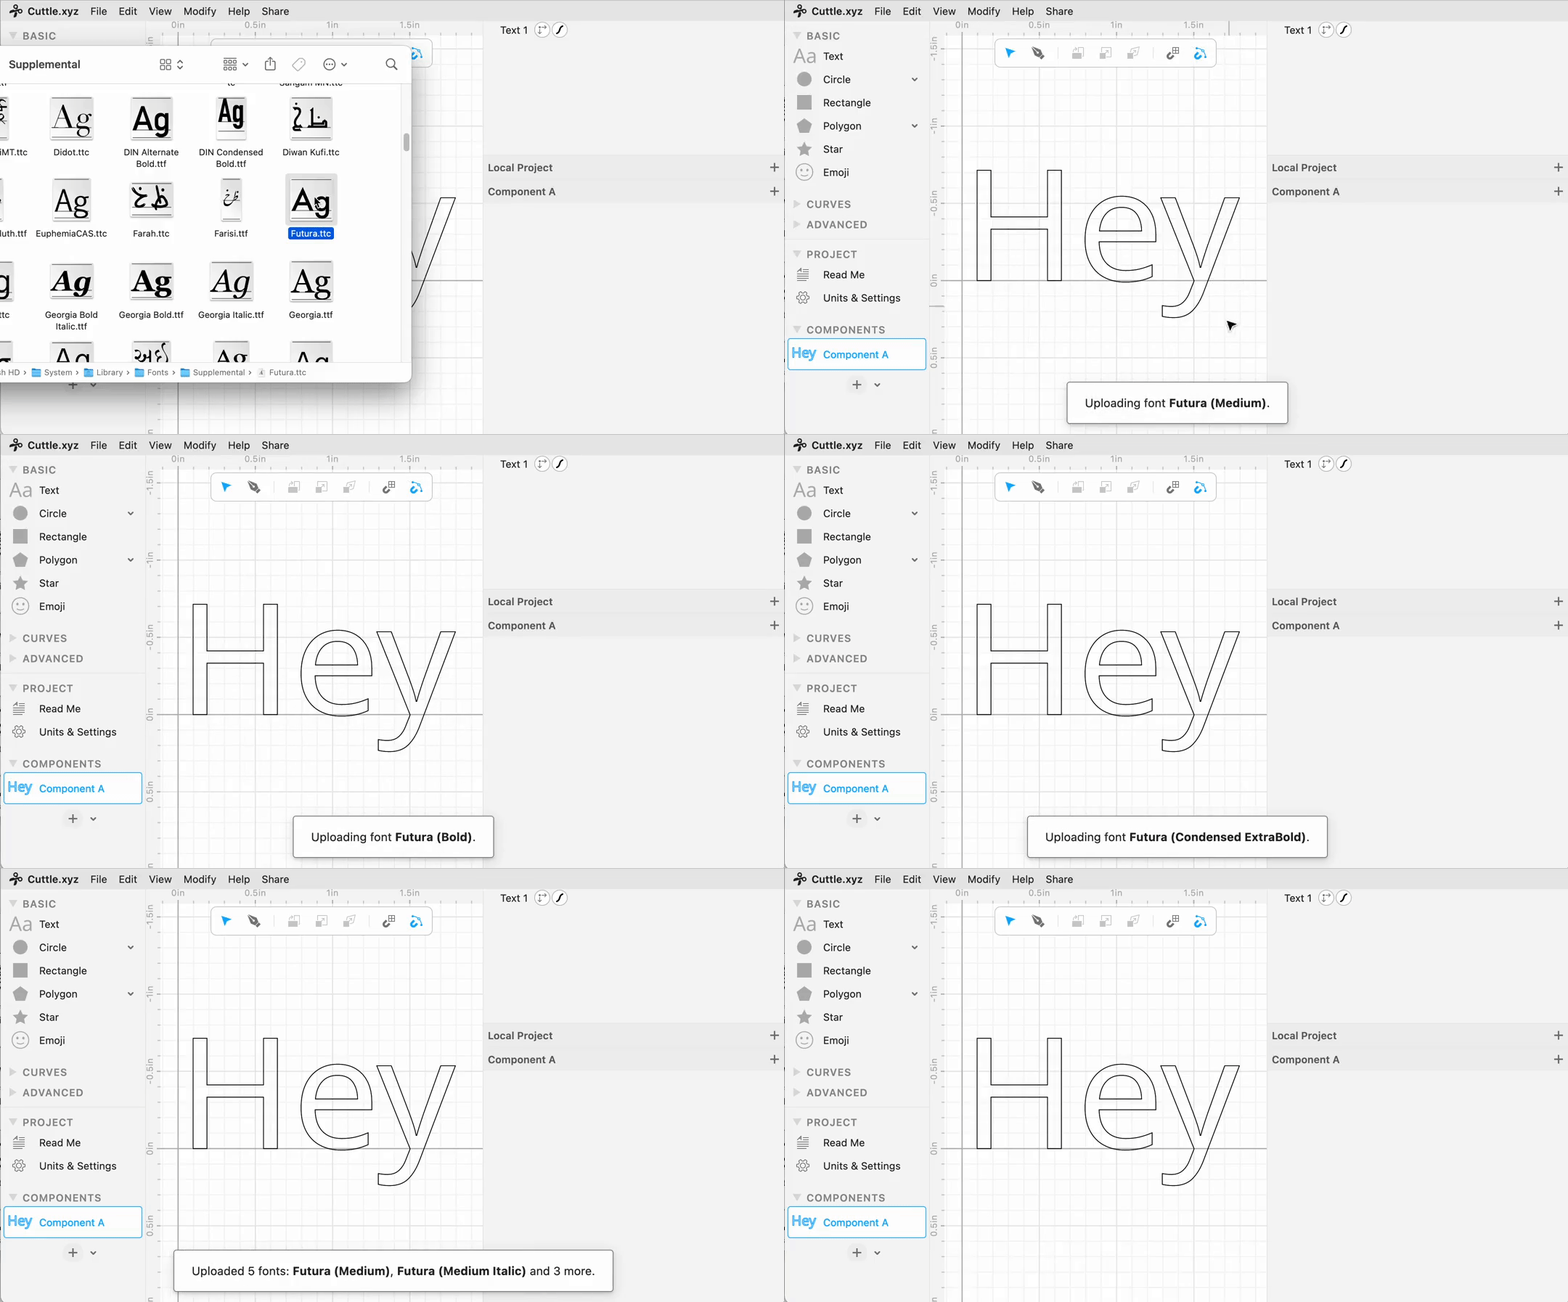
- Drag this font file into the Cuttle browser window.
Windows: Adding your system’s fonts
On windows, your system’s fonts can be found in C:\Windows\Fonts
- Open the File Explorer by pressing Win+E and navigate to C:\Windows\Fonts
- Choose the font you want to add and drag it into the Cuttle browser window.

About font licensing
Fonts are available under a range of licenses. Cuttle’s built-in fonts have permissive licenses (SIL OFL), which means you can use and sell creations that use those fonts.
When you add new fonts to your account, we can’t check the license of those files, so we won’t make them public. Each user will only be able to see the fonts that they have uploaded.
If you share a project using a font you added, other people will not see the font unless they also have a Pro account and have uploaded the same font file.
When you use a font, make sure to comply with that font’s license. Some fonts are for personal use only or require purchasing a commercial license. Please respect the font creator’s intellectual property.