Pumpkin Ornament Photo Frame
 Sam | Samantha's Doodles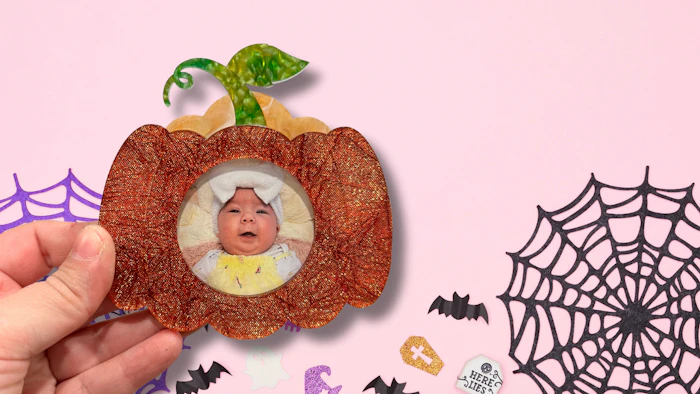
Layered Ghost Photo Frame Ornament
Update text detail on "Back Piece" as needed. You can change the "Name" and "Year" options. If you don't like the Spooky Font, you can try September, Honey Babe, or Vanilla Cream.
Download SVG File
Cut "Frame Piece" from 1/16 or 1/8 clear acrylic (this is the foundation element of your piece - it protects the photo and gives the design elements somewhere to adhere to). I like to use 1/16, but if you believe it will be handled a lot, consider using 1/8 for extra support.
Cut "Pumpkin 1," "Pumpkin 2", and "Stem" elements from any thickness of material with double-sided adhesive on BACK of your pieces. They are separated by color.
Cut "Back Piece" from same thickness of material. I usually match this to a color from my front components.
Cut the "Spacer" element from 1/16 acrylic with double-sided adhesive on BOTH SIDES of piece - this is where the photo will sit.
Color fill engraved areas on "Back Piece" as needed/desired with craft paint or markers.
Assemble as follows (video for reference: https://youtu.be/RuwA-5RvkgQ)
Place "Pumpkin 1" element on front of clear frame piece, taking extra care to line up edges.
Place "Pumpkin 2" above it
Place "Stem" between the "Pumpkin 2" pieces. Note: there is some clear that will show where there is a hole in the stem. This is intentionally left solid for stability.
On the back, line up and place your spacer piece so it sits and frames around the hole inside your pumpkin for the photo.
Place the backer element on top of your spacer piece.
Add a ribbon for hanging
Add a photo
FILE KEY:
Blue = Score
Red = Cut
Black = Engrave