Dry Erase Santa Sign
 Sam | Samantha's Doodles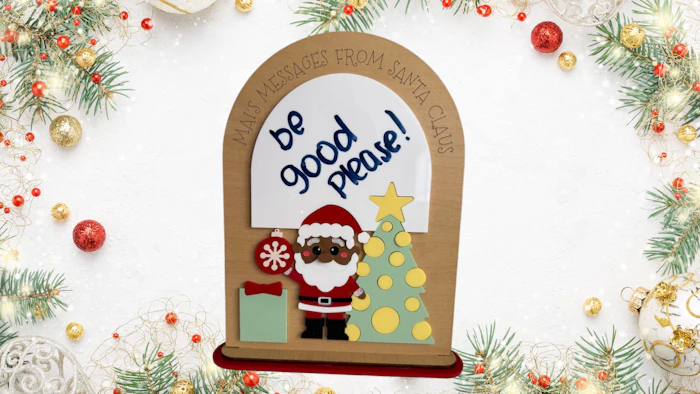
Dry-Erase Santa Sign with Customizable Text. Instructions, recommended materials, and fonts below.
Update text as needed. Approx. 30 characters or less is recommended.
If you want a different font, I like these scoring fonts: Pinsetter (Pro), EMS Readability, Cutlings Geometric, and EMS Herculean.Update Material Thickness and Kerf
Download SVG File
Recommended Materials below:
Backer: any material. Just be sure to note thickness parameter before downloading file. I use Eco-Birch from Smokey Hill - scoring shows well and super easy clean up!
Tree and Santa elements: I use 1/8-inch material (acrylic, wood, or MDF). I recommend applying 3M or comparable adhesive on BACK of your materials before cutting, though you can use another adhesive if preferred.
Dry erase board element: I use glossy white acrylic, but you can also do dry erase material. I recommend applying 3M or comparable adhesive on BACK of your materials before cutting, though you can use another adhesive if preferred.
Base & Platform: Same type of material as your backer. If using a different color/style, do your best to make sure it is the same thickness. If you don't want to use glue, you can apply 3M or comparable adhesive to the back of the top base piece (the one with the hole in it) so you can easily adhere it to the platform piece.
Score, Engrave, and Cut elements by following file key
Color-fill any engraved areas as desired. I prefer using craft acrylic paint and will color fill the highlights on the eyes, rosy cheeks, mouth, cuffs on the shirt, and belt buckle.
Assemble by following score lines and preview/sample image as a guide. For base, stack piece with hole on top of solid platform piece. Should be a snug fit if you have input your kerf correctly.
FILE KEY:
Blue = Score
Red = Cut
Black = Engrave
Difficulty Level:
Intermediate - many elements + base allows for kerf adjustment. Scoring for placement should help. The only piece that is "tricky" is the nose - I layered it on top of the face for a fun 3D effect.