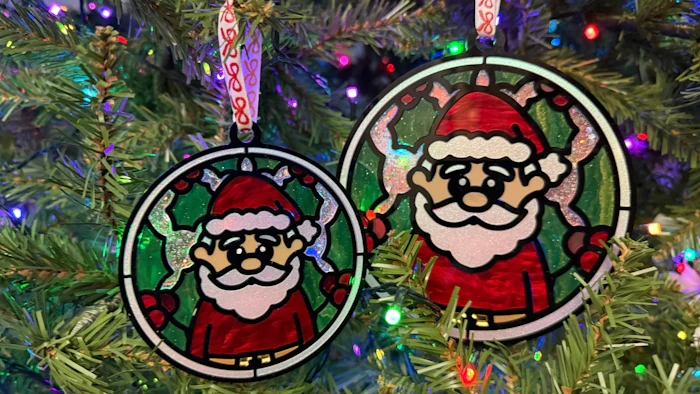
4in Santa Mosaic Ornament
 Sam | Samantha's Doodles
Introducing our Santa Mosaic Ornament Design. There are a few options of how you can use this file.
Outline on Backer only (think fun colored/patterned flex)
Outline on Backer w/ Colored Pieces - "Mosaic" style
Outline on Backer w/ some Colored pieces - "mix and match"
This version is scaled at 4" as an ornament. We DO NOT recommend going any smaller, unless you are repurposing and engraving the design. 10in sign file can be found here!
Here's how to get started:
Input kerf adjustment if desired (if NOT adjusting or doing in Lightburn, leave at 0.00) - this will apply an offset to all pieces in the measurement entered, which helps with visible gaps. Because we use the backer layer, we don't need it to be pressure fit, but I still like to add 0.002 inch to my files.
Choose hole or no hole (for hanging)
Print desired elements
For outline only, apply 3M or comparable on back of outline piece material
For full mosaic, apply 3M or comparable on top of backer piece material
For Mosaic: if using an opaque backer, no light will shine through any of the front pieces. If using a translucent backer, you will be able to see through any translucent colors used in the mosaic.
Assemble. Always place outline first, aligning the edges for placement and then pressing down to secure. If adding inside pieces, follow design like a puzzle.
Color fill eye highlight with white paint or marker
Add ribbon for hanging if applicable
IF SCALING AFTER DOWNLOADING - BE SURE TO "SELECT ALL" - KEYBOARD SHORTCUT "CTRL + A" OR "CMD + A" WILL SELECT ALL PIECES. I do not recommend cutting smaller than 4". Presized sign (10in) option available here.
FILE KEY:
Red = Cut
Black = Engrave
DIFFICULTY LEVEL:
Outline only - BEGINNER (one layered piece and one paint filled engrave)
Mosaic style - INTERMEDIATE/ADVANCED (some small pieces, paint filled engrave)
Pictured Below: Mosaic style, with hole added, in 4" and 6" sizes