Magnetic Faux Leather Box
 Kristin - Krixie's Creations
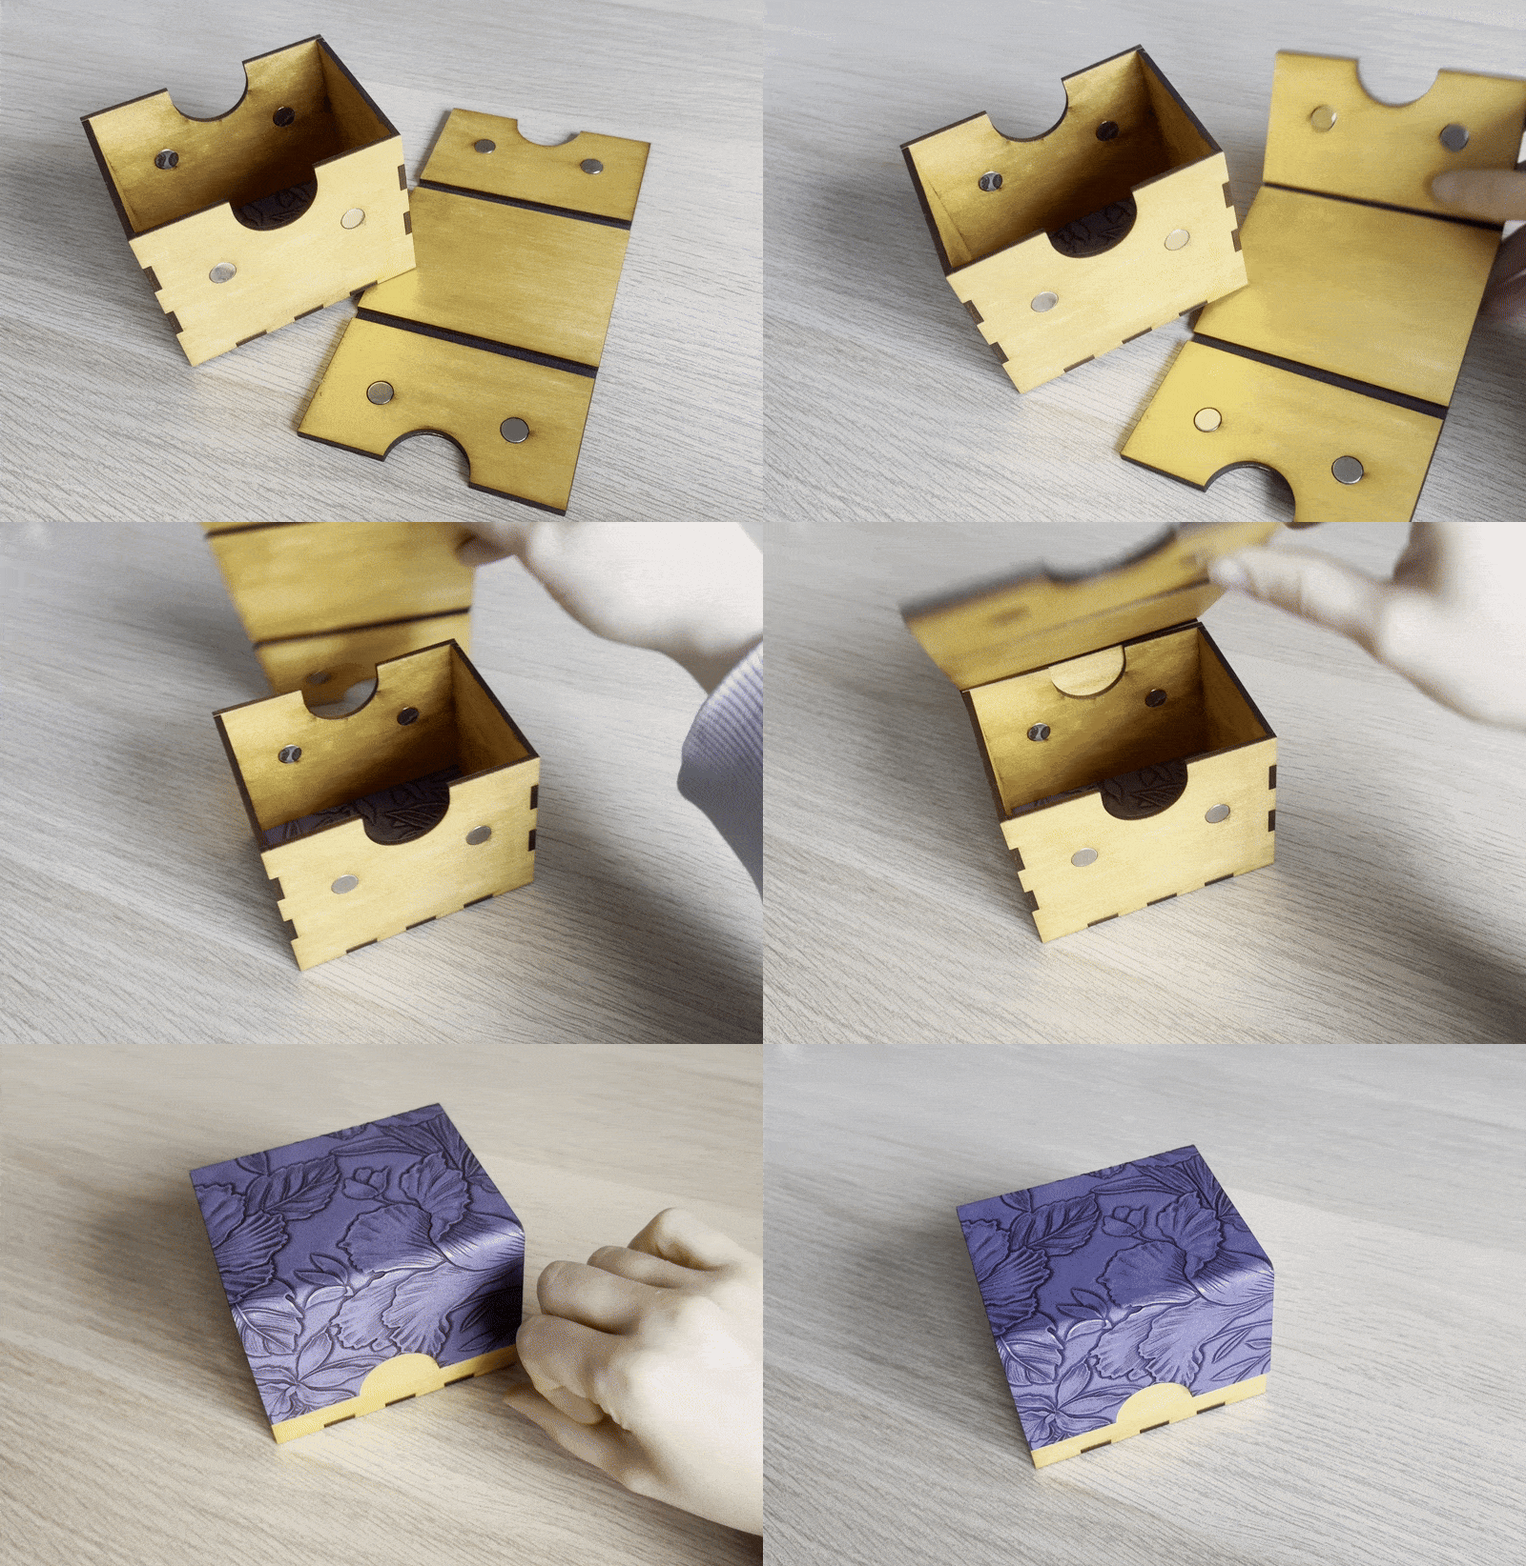
This is a mixed media box that uses a combination of wood, fabric and magnets to make a beautiful and functional design.
Customizations
The box size has been measured for the purpose of storing a deck of trading cards! It can hold 100 sleeved cards. However you can easily resize the box for any purpose and even remove the semi-circle if you prefer (set circleRadius to 0)
You can also customize this box with any designs you would like on the sides and top. Some examples below. I hope to improve the template with plug and play customization for this.

Materials
Wood of the desired color. In the examples above I have used acrylic paint to paint the plywood which I will apply first before cutting. I have also used Padauk and Purple Heart wood to make the two other boxes you see below. I use Ocooch hardwood to source this wood.
Leather/Faux leather for the top. You will need something with a strong structure so I like to go with a Faux leather like fabric. I have used these embossed faux leather sheets from Amazon for a reasonable price.
8 Strong 10mm x 3mm round magnets. You can buy these from amazon as well, I have purchased this listing.
Wood Glue. (I use Titebond II) You will need this to glue the leather fabric to the wood for the top. Optional to use on the joints for a secure fit.
**I get a small commission from Amazon Affiliate links

Assembly

First we cut out all the layers both the wood and the leather. Have 8 magnets ready.

Next we assemble the top. You will fully glue the back of each side and then flip them over to align it with the back side of the fabric. Use plenty of glue.
Glue the backside of the center piece and align it centered on the back of the fabric
Then we want to place the magnets. Add glue to each magnet hole. Make sure they are all the same side/polarity. I do this by aligning the stack of magnets to fit in the hole and sliding it sideways to break apart, always keeping the same side of the stack up.

While that dries, we can move onto the box part. Take the square bottom fabric piece and glue it centered on the inside of the bottom.
Glue magnets into the long sides of the box. Here we must make sure that the polarity will attract the top on the outside of the box, so use the same trick with the remaining stack to align them to match.

Now we can assemble all 4 sides against the base to build the box. This works very similar to the video here as well as explains kerf if you need to tweak that for a tight fit.

We have now completed both components! Let them dry for at least 1hr before attempting to close the box.

After an hour, you can then close the box and leave it to dry that way. I like to put the top on at this point such that it confirms I have all the magnets polarity correct and helps if I want to clamp the full box.
That's it you are done!