DIY Monster Lunchbox Coloring Set
 Keeley Designs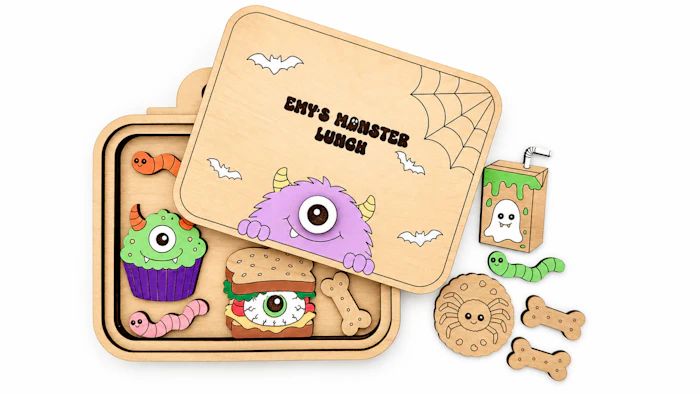
This playful kit includes a monster lunchbox tray, lift-off lid, and fun removable pieces like a monster cupcake, eyeball sandwich, slime juice box, worms, bones, and a spider cookie. Kids can color the pieces with paint markers, acrylic paint, or their favorite supplies, then pack and unpack their silly monster lunch again and again.
Instructions:
1. Color the lunchbox lid.
After cutting, color or paint the lunchbox lid, and eyeball lift piece before assembly, if desired. It is usually easier to color the engraved and scored details before the layers are glued together.
2. Build the lunchbox frame.
Glue or adhere the wide frame layer on top of the base piece. Next, glue or adhere the wide frame layer with the handle attached on top of the first wide frame layer.
3. Add the thinner frame layer.
Once the wider frame layers are dry, glue or adhere the thinner frame layer on top. This thinner layer creates the inset area where the lunchbox lid will sit.
4. Attach the eyeball lift piece.
Glue the eyeball piece to the monster face on the lunchbox lid, using the score lines as a placement guide. This piece adds a fun monster detail and also makes it easy to lift the lid.
5. Color the monster lunch pieces.
Color or paint the removable pieces, such as the monster cupcake, eyeball sandwich, slime juice box, worms, bone treats, and spider cookie with paint markers, acrylic paint, or your preferred coloring supplies.
6. Place the pieces inside.
Add the finished monster lunch pieces to the lunchbox, then place the lid into the inset frame. Use the eyeball piece to lift the lid and reveal the silly monster lunch inside.
Materials:
⅛” Plywood (shown is Maple TruFlat and from Houston Acrylic)