Polygon Box
 Cuttle Official
Make a hexagon, octagon, or any-sided box. Choose the number of sides and customize the diameter, height, material thickness, and more.
How to use
Choose the number of
sidesfor the base. The lowest number possible would be 3 for a triangular box.Choose the outer
diameterof the box and theheight. The default dimensions make for a good pencil container.Set the
materialThicknessbased on the material you're cutting. This will determine theheight of the slat joints.
Set the
kerfto compensate for the kerf of your cutter. A value of 0.007" is usually good for tight-fitting laser-cut finger joints, but you might need to adjust this depending on your material, material thickness, and cutter.If
includeTopCoveris enabled an additional component will be added that can be glued on top to hide the finger joint slots.When cutting set the black elements (inner cuts) to be cut first and the red elements (outer cuts) to be cut last.
Assembly
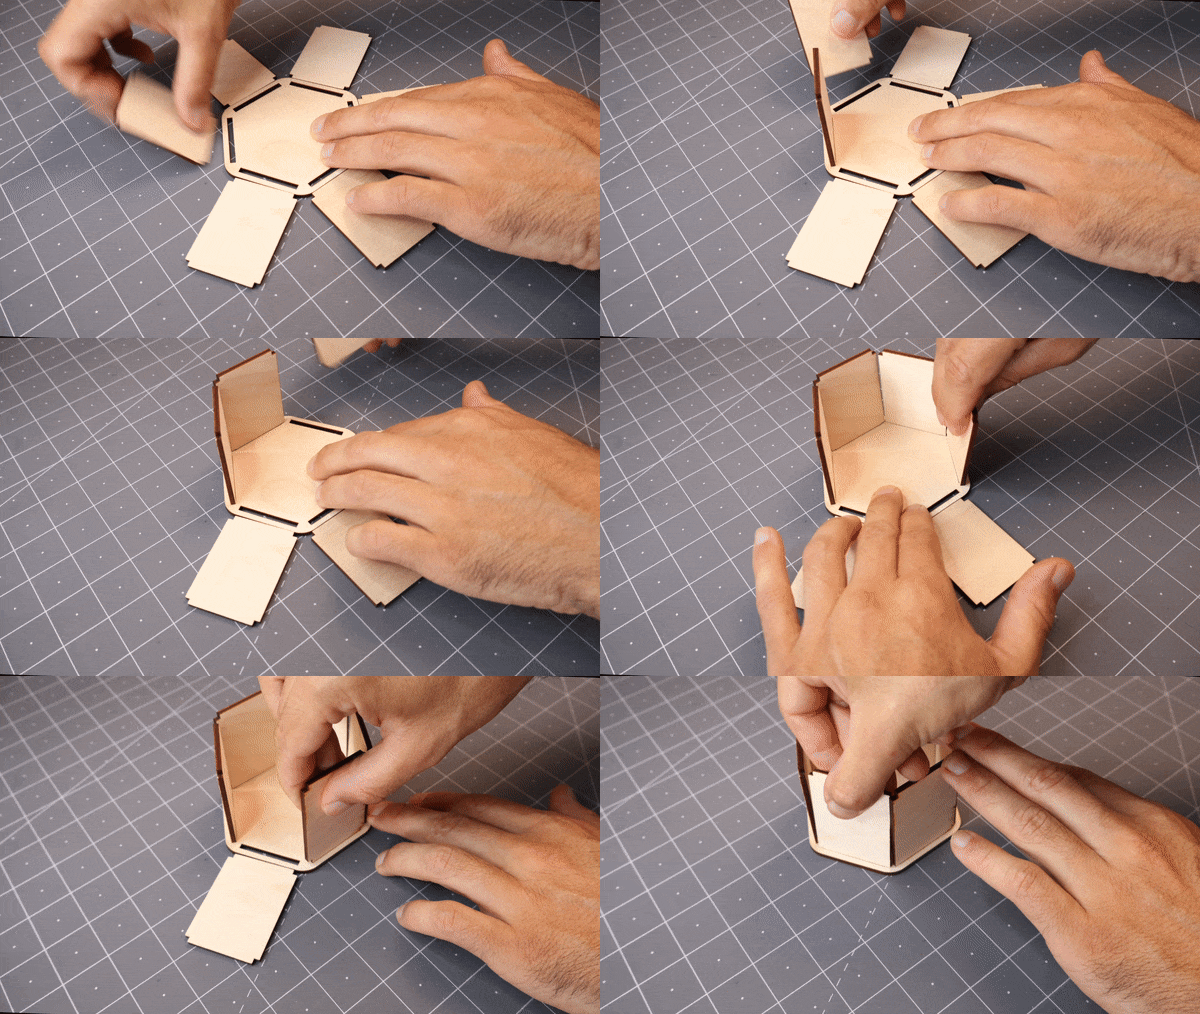
Attach all the Slats (the long pieces that make the sides of the box) to the Bottom of the box.
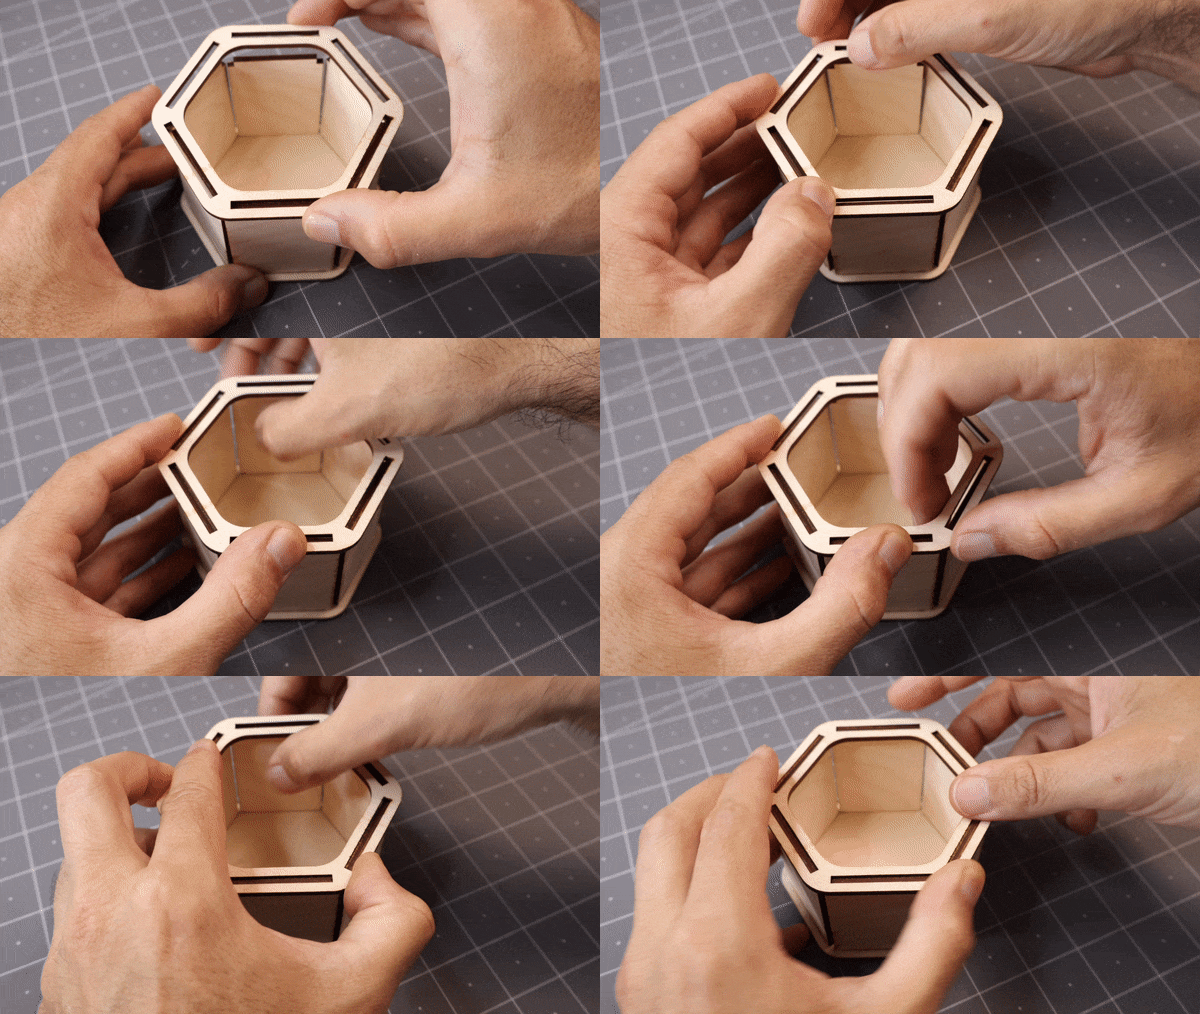
Place the Top on the Slats and slowly work around pressing and wiggling the slats to make them go into the matching holes. This part is a little fiddly but you can do it with some patience. Once they are all in you can tap it lightly with a mallet.
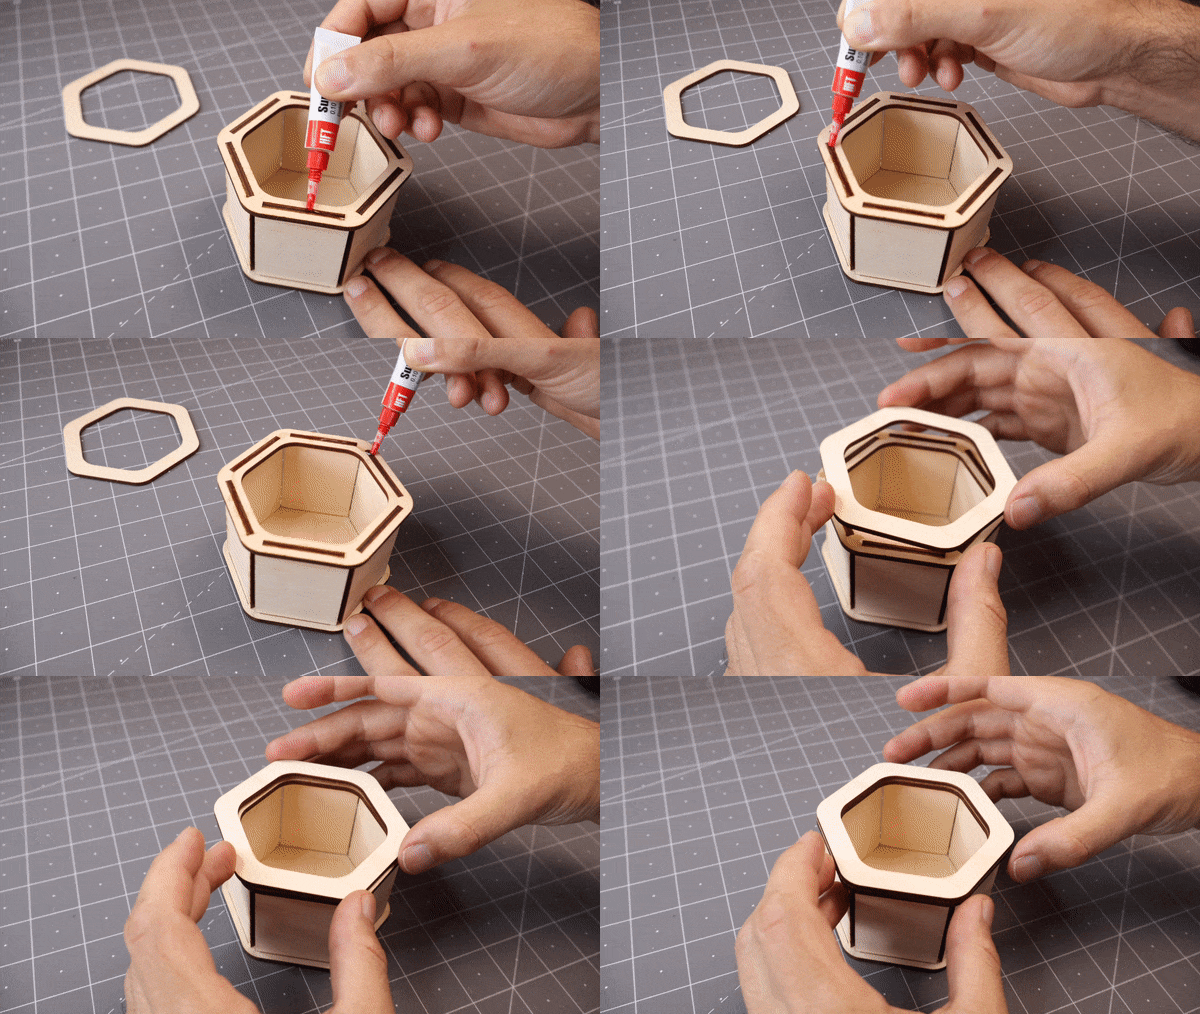
If you included a Top Cover now you can glue it to the top.
Variations
We encourage you to add decorative elements to the sides of the box. For inspiration check out this version of the Polygon box with a Mandala Pattern:

